

Troubleshooting Lighting Gear on Set: A 2026 Guide
Table of Contents
- On-Set Emergency Triage: First Response When a Fixture Dies
- Lighting Technician Tool Kit Essentials for Fast Diagnostics
- Common Lighting Gear Failures on Set and How to Fix Them
- Electrical Safety for Film Sets: Protocols That Prevent Downtime
- Digital vs. Analog Signal Troubleshooting: DMX and Control Systems
- Environmental Factors and Maintenance Protocols for Lighting Gear
- Frequently Asked Questions
Last Updated: September 10, 2026
On-Set Emergency Triage: First Response When a Fixture Dies
A fixture failure mid-take is a scheduling problem, not just a technical one. The first responder's job is to restore a usable image fast, then diagnose properly once the shot is safe. Troubleshooting lighting gear on set starts with triage: keep the camera rolling, isolate the fault, and protect the rest of the rig from whatever caused it.
Here's the sequence that works. Check the fixture's own power indicator first, then the cable, then the control signal. Most dead fixtures are not dead. They are unpowered, unaddressed, or sitting on a tripped circuit.
A common mistake is swapping the fixture before testing the feed. If the replacement also fails, you have lost ten minutes and learned nothing. Test the circuit with a multimeter, confirm voltage at the outlet, then decide.
The five-minute triage order:
- Confirm power at the outlet or distro
- Inspect the cable and connectors for damage
- Check the fixture's breaker or fuse
- Verify the DMX address and signal
- Swap the fixture only after the feed tests clean
Lighting Technician Tool Kit Essentials for Fast Diagnostics
A lighting technician's tool kit is a diagnostic instrument, not a general repair box. The kit that resolves most on-set failures fits in one bag: a multimeter, a DMX tester, spare cables and connectors, a continuity tester, gaffer tape, and a headlamp. Everything else is a convenience.
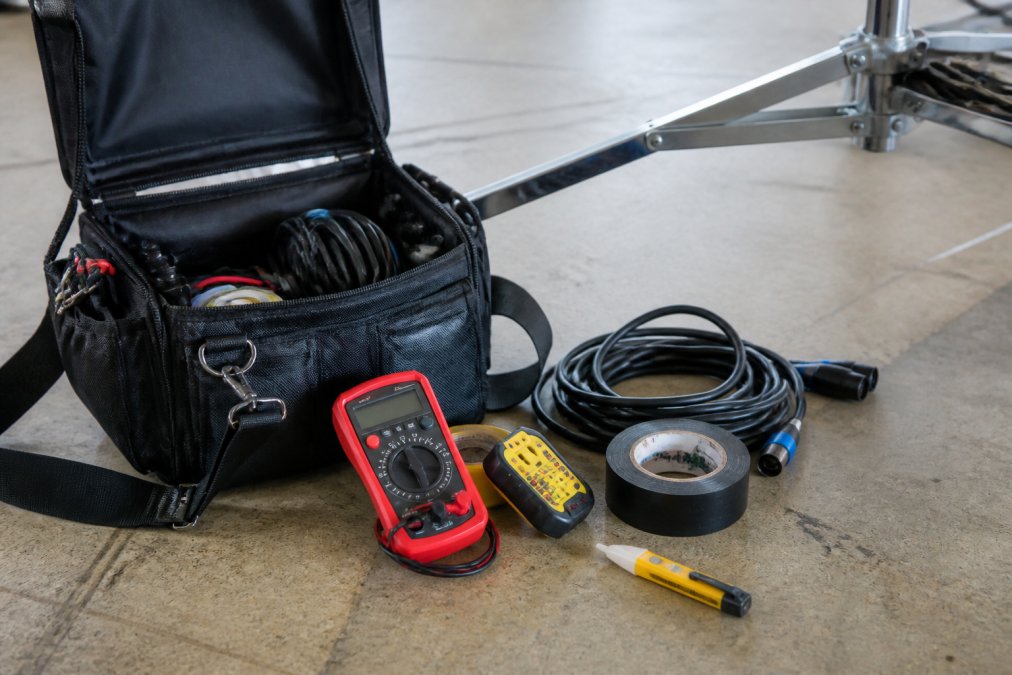
The multimeter earns its place first. It confirms voltage at a distro, checks continuity through a suspect cable, and settles arguments about whether a circuit is live. A DMX tester does the same job for control signal, telling you whether a fixture is receiving data before you touch its menu.
What most guides miss is the value of spares over tools. Two spare DMX cables, a spare power cable, and a spare connector of each gender solve more on-set problems than any diagnostic device. Cables fail far more often than fixtures do.
Common Lighting Gear Failures on Set and How to Fix Them
Most failures fall into two families: optical or thermal problems inside the fixture, and electrical or signal problems in the chain feeding it. Sorting a fault into the right family tells you where to look first. The table below maps the failures technicians see most to their likely cause and the fastest fix.
| Symptom | Likely Cause | First Fix |
|---|---|---|
| Flicker at partial intensity | Dimmer or ballast incompatibility | Test at full output, swap ballast |
| Color temperature drift | Aging LED array or gel fade | Compare against a reference fixture |
| Fixture dead, no indicator | No power at outlet or tripped breaker | Meter the feed, reset breaker |
| No response to console | DMX address or cable fault | Verify address, run continuity test |
| Harsh shadows, hot spots | Missing diffusion or wrong position | Add diffuser, adjust distance |
| Intermittent dropouts | Loose connector or voltage drop | Reseat connectors, shorten run |
Flicker and Color Temperature Imbalances
Flicker usually traces to a mismatch between the dimmer and the fixture's driver, not to the fixture itself. LED arrays and tungsten units dim on different curves, and a dimmer designed for one will make the other stutter at low intensity. Test the fixture at full output first. If the flicker disappears, the problem is dimming, not the light.
Color temperature drift is slower and easier to miss. An aging LED array shifts warmer over time, and gels fade under heat. Place the suspect fixture beside a known-good unit of the same model and compare on camera. Calibration against a reference is the only reliable test.
Power and Electrical Troubleshooting
Power faults on set usually come down to voltage drop or an overloaded circuit. Long cable runs lose voltage, and a distro loaded past its rating will sag or trip. Measure voltage at the fixture end of the run, not at the distro. If it reads low, shorten the run or move to a different circuit.
Circuit breakers trip for a reason. Before resetting, count the load on that circuit and check for a damaged cable. A breaker that trips repeatedly under the same load is undersized for the job, not faulty.
Electrical Safety for Film Sets: Protocols That Prevent Downtime
Electrical safety for film sets is a preventive discipline, and it is where downtime is actually avoided. The protocols are unglamorous: rated cable for the load, proper grounding, no daisy-chained distro boxes past their rating, and a safety cable on every overhead fixture.
Canadian productions work under provincial occupational health and safety rules, and the electrical requirements vary by jurisdiction. The Canadian Centre for Occupational Health and Safety guidance on electrical safety sets out the general principles: de-energize before working on a circuit, use rated equipment, and inspect cables before every use. Gaffers should confirm the specific rules for their province before rigging.
The practical protocol that prevents most incidents:
- Inspect every cable and connector at load-in
- Match cable gauge to the load and run length
- Ground every distro and every metal fixture
- Fit a safety cable to any fixture overhead
- Keep water and cable runs apart
Digital vs. Analog Signal Troubleshooting: DMX and Control Systems
DMX and control faults behave differently from power faults, and the two get confused constantly. A fixture that has power but ignores the console is a signal problem. A fixture with no indicator light at all is a power problem. Knowing which one you have cuts diagnosis time in half.
The DMX signal is a digital chain, and it fails in predictable ways. Each of these produces a distinct symptom:
- Wrong address or mode. The fixture responds, but to the wrong channel or with the wrong personality. Check the patch against the fixture's menu before touching the cable.
- Broken or intermittent cable. Dropouts that come and go as the cable is moved. Run a continuity test on the suspect run.
- Missing terminator. The last fixture in the chain needs a 120-ohm terminator. Without it, signal reflections cause erratic behavior, often on the fixtures nearest the end of the run.
- Too many fixtures on one universe. A single DMX universe carries 512 channels. Once the fixture count exceeds that, later fixtures in the chain behave unpredictably. Split the run across a second universe or an opto-splitter.
- Long or daisy-chained runs. DMX is designed for a maximum run of roughly 300 meters over a single chain. Beyond that, or with too many fixtures in series, the signal degrades. An opto-isolated splitter breaks the chain into clean segments.
A DMX tester is the fastest way to separate signal from fixture. Plug it in at the fixture and read the signal. If data is present, the fault is in the fixture or its address. If it is absent, work back along the chain, testing at each connector until you find where the signal stops.
Analog control, still found on older dimmer racks, fails differently. It drifts and reacts to interference rather than dropping out entirely. If an analog channel behaves erratically while its neighbors are fine, suspect the control cable or a grounding issue before the rack itself.
Firmware is the failure mode most guides skip. Modern fixtures run embedded software, and a unit that suddenly stops responding correctly, flickers at a specific intensity, or ignores a DMX command it used to obey may simply be running outdated firmware. Check the manufacturer's release notes for known bugs and update the fixture before you replace it. A fixture that behaves oddly only on one console, or only after a specific sequence of commands, is a firmware suspect, not a hardware one.
Environmental Factors and Maintenance Protocols for Lighting Gear
Heat, dust, moisture, and vibration shorten the life of every fixture on a set, and maintenance is what keeps those factors from becoming failures. A scheduled inspection routine catches the problems that cause mid-shoot downtime: a cracking cable jacket, a loose connector, a fan clogged with dust.
Build maintenance into the production calendar rather than reacting to failures. Before each shoot day, inspect cables and connectors. Weekly, clean cooling fans and vents on fixtures that run hot. After any outdoor or damp shoot, dry and inspect everything before it goes back in the case.
Extreme conditions deserve their own playbook, because the failure modes change:
- Heat. LED arrays and drivers derate as ambient temperature climbs. A fixture that runs fine indoors may flicker or shut down in direct sun. Shade the fixture body, keep vents clear, and avoid stacking units so hot air from one feeds the intake of another.
- Cold. Battery-powered units lose capacity fast below freezing, and some LED drivers refuse to strike until they warm up (energy.gov). Keep spare batteries inside a jacket or case, and allow fixtures a few minutes to acclimate before a take.
- Humidity and rain. Moisture in a connector causes intermittent faults that look like cable failures. Use rated connectors, keep cable runs off wet ground, and dry every connector before it goes back in the case. A fixture that took on water should be dried and inspected before it is powered again.
- Dust and sand. Fine particles clog fans and coat optics. Blow out vents and clean lenses after any dusty location shoot, and consider a filter or cover on fixtures that run in exposed positions.
- Vibration. Truck transport and handheld rigs loosen connectors and screws. A quick check of mounting hardware and cable seating at load-in catches most of these before they become mid-take failures.
Firmware matters more than it used to. Many modern fixtures take firmware updates that fix known flicker and control bugs, so check the manufacturer's release notes when a fixture behaves oddly. A unit that suddenly stops responding correctly may simply be running outdated firmware.
Frequently Asked Questions
What are the most common causes of lighting failure during a shoot?
The most frequent culprits are loose or damaged cables, blown fuses, tripped circuit breakers, and DMX signal interruptions. Flicker often traces back to a failing ballast or incompatible dimmer, while color temperature shifts can indicate an aging LED array or a gel that has degraded. Start by checking power at the fixture with a multimeter, then inspect connectors and cable runs before swapping out the unit itself.
How can I troubleshoot lighting problems without disrupting the shoot?
Work from the power source outward: confirm the circuit breaker is on, test the outlet, then check the cable and connector at the fixture. Keep a known-good spare cable and fixture on hand for quick swaps. If the issue is DMX-related, bypass the daisy-chain and connect the fixture directly to the controller. Document what you changed so you can restore the original setup once the shot is complete.
What basic tools should every lighting technician carry on set?
A multimeter for voltage and continuity tests, a DMX tester, spare fuses, a circuit tester, gaffer tape, cable ties, and a headlamp are essential. Include a small screwdriver set for tightening terminal blocks and a can of contact cleaner for dirty connectors. A notebook or phone app for logging fixture addresses and DMX channel assignments also saves time when troubleshooting complex rigs.
How do you safely troubleshoot high-voltage lighting gear?
Always disconnect power before inspecting any high-voltage fixture. Use a multimeter to verify zero voltage at the terminals, and never assume a switch has isolated the circuit. Wear insulated gloves when working near live panels, and follow lockout/tagout procedures if the fixture is hardwired. If you smell burning or see scorch marks, tag the unit out of service and report it immediately rather than attempting a repair on set.